Sunday, March 30, 2014

Clash of Shieldwalls

I got a new game, War of Ashes: Shieldwall, by Zombiesmith!
So, naturally, I had to play with it quite a good amount. It also has nice shiny figures that my father decided to paint s striking shade of blue. It is a pretty normal game from the maneuver and tactics standpoint, but it has very unique background text and also a unique combat system. I hope to play more of this and show it off to you in a couple of weeks. Now, onto the pictures. They focus upon the most entertaining pats of three different battles we fought.
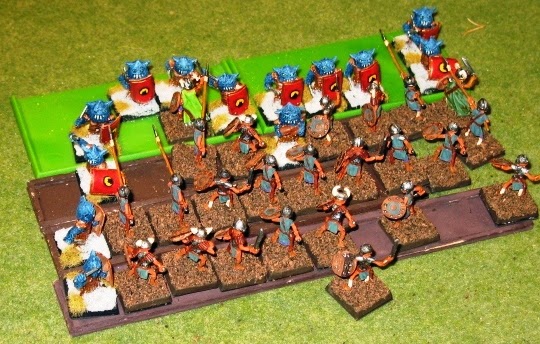
Our shieldwalls lock in an introductory combat to familiarize ourselves with the system.
Shiiiiiiny new toooys!
This is where the unique combat system comes into play: the initial clash turns into a swirling melee.
The combat degenerates into a mess, and the Jaarl hold the upper hand.
I lost that one, but here is a picture of my mighty Ylark hitting some frail skirmishers. Havoc ensues.
They do eventually kill it. Sad day.
Here is the third battle.
My ylarks line up for a devastating charge.
One goes in on the tough unit full of Rigenti, the Jaarl's elite fighters.
Nice spray of blood there.
Sadly, the Jaarl preempt my ylark on the right.
 My last ylark charges in aflame.
The Jaarl just wreck this unit.
Yup. We're going down.
 
All in all, a fun series of games. You will see me play this game again. See you in a couple of weeks!


Saturday, March 8, 2014

More Sagas

I have decided to play some more Saga, as I had quite a fun time with it the first time. We have pretty much the same forces, just larger, for the first one, and for the second battle in this group of two we have the same forces we had in all the previous battle reports. The first battle is one in which we are trying to cross the river. the second one is the same pitched battle that we all know and love.
We are aligned across from each other across the river.
A view from the other side.
My hearthguard are the first ones on the bridge, and they get slinged to death. I am now preparing the anti-shooting power each turn. 
All my forces are already heavily fatigued.
I attempt a crossing of the bridge.
My hearthguard charge and get repulsed, losing half of their number.
There are a ridiculous number of Anglo-Saxons on the other side of that bridge.
The next turn was simply a turn of repositioning.
My hearthguard suck, but my warlord is a god.
Another shot of that, because that's what Norse sagas are all about.
M warriors on the other sided of the battlefield finally fight their way across the bridge.
My warriors advance, two abreast, behind their lord.
We face off.
Both warlords retreat.
My levy advances in support of my warriors.
 This has obviously developed into two separate mini-battles.
My warlord appears to be beating back the enemy on the stone bridge.
The enemy are on the back foot.
My warriors are dead and the enemy are across.
There are now no Anglo-Saxons on the stone bridge at all.
There is quite a force of Anglo-Saxons across the wooden bridge now, to win the game.
My warlord is across, but it's not enough.
A victory for the Anglo-Saxons. Very frustrating.
A new battle has begun. We face off across a village.
The shields on the Vikings are very impressive.
One of my units of warriors committed suicide to kill six of the enemy's warriors.
That unit is smaller.
My warriors and warlord charge in to rout it, at the cost of four of our own.
My hearthguard are coming in to reinforce.
The levies bounce off of my hearthguard, but one of our own is down.
The berserkers always seem to suffer a high number of casualties.
The levy form a circle around my hearthguard so they can't get to my warlord.
Not for want of trying, though.
Our warlords end the battle locked in mortal combat, with mine finally being struck down.

These were a couple more fun scenarios. I think that I needed to make a better plan for the first scenario, go in less piecemeal, and just get shot less. For the second one, I probably needed to have my hearthguard and berserkers in the right place to begin with. I had fun though.

See you in a couple of weeks with the report from the latest club meeting!

The Invasion of Gaul

Here is a quick report on an ancient battle at the club last month. The Romans are trying to invade Gaul, and I don't want them to do that. We are using my father's homebrewed Legion vs. Horde rules.
Without further adieu, here is the battle.
 The Roman battle line is lined up against us.
 
My battle line is also quite fearsome.
My leader, Vercingetorix, watches the skirmish battle...
 And the inevitable skirmish rout.
 My cavalry on the right flank gets stuck in and appears to be winning.
Until some of it routs.
The front rank of Gauls charges and wipes out some Roman velites.
I have the first charge on the Romans.
We do some more inconclusive cavalry fighting on the right.
The infantry clash quickly degrade into utter chaos on the right.
On the left, I have routed the Roman auxiliaries. Labienus over there looks confused.
I am looping around his left flank.
My infantry on my right got flanked by the victorious Roman cavalry.
We charge on the left. This battle is rotating.
Vercingetorix surveys his collapsing flank with dismay.
Ambiorix becomes the last man on the Gallic right flank. Not good.
The lines have completely degenerated into utter chaos on both sides.
 My cavalry successful charges into the flank of a Roman unit, leaving me victorious.
 
I always enjoy playing at the club, as it gives me a chance to play against someone other than my father and therefore a chance to actually win and to experience different play styles. This one came down to the wire. The game has a chit draw based activation system, and if my chits had not come up first, I would have lost. I am pleased with my performance, as I played it how Gauls are meant to be played and I emerged victorious.