Forces... 1750 points... reserves are highlighted
Jordan:
German Late War Panzergrenadier Company, trucks, not halftracks, Confident Veteran
Note: All platoons come with some combination of trucks and cars. It would be tedious and slow to list them all.
Command: 2 Panzerfaust teams and a Panzerschreck
Combat: 3 Panzergrenadier squads and a Panzerfaust
3 Panzergrenadier squads and a Panzerfaust
3 Panzergrenadier squads and a Panzerfaust
2 Machine gun sections (4 MGs total) and a Panzerknacker (attached to infantry)
Weapons: 3 PaK40s (in Ambush)
2 Mortar sections (4 mortars and 2 observers total)
3 Panzergrenadier Pioneer squads
Support: 4 PaK40s
3 NW41 Nebelwerfers and an observer
Dave:
Late War Generic Soviet Infantry Battalion, Confident Trained
Note: This is my father's tournament list. He wins large tournaments and/or gets Best General with this thing. I have never beaten it.
Command: 2 rifle teams, 1 Komissar, 2 45mm Anti Tank guns with limbers
Combat: 2 rifle platoons, 1 SMG platoon, and a Komissar
2 rifle platoons, 1 SMG platoon, and a Komissar
Weapons: 8 Anti Tank Rifles (attached)
4 76mm Regimental Guns
Support: 4 T-34s and 5 T-34/85s
4 SU-85s
Mission
The mission was Pincer, which has the attacker's full force attacking half the defender's lengthwise, trying to get one of two objectives. The defender has reserves coming in on the sides, trying to pinch off the opponent, hence the name.
Terrain
I have no pictures of the terrain this time, again.
Deployment
No pictures of deployment either. This report wasn't my best work.
I deployed the two infantry platoons on the objective that my father had put close to his own lines and the mortars were put in between his forces and the other objective, although they're more of a speed bump than a wall.
Dave just lined all of his stuff up on the line and readied to charge forward, with infantry down the middle, armor on each side, and guns in the back.
Turn 1

The Soviets sound a general advance. The mortars cause some casualties and pin one platoon, but it's not enough. It is first blood, though.

Meanwhile, the Germans stoically defend the objective.

They face daunting opposition.
Turn 2

The Soviet left flank advances further, killing a mortar observer in assault.

Some Germans were also pinned down.

The right flank advances as well. This doesn't bode well for my mortars...

The observer is also feeling some concern.

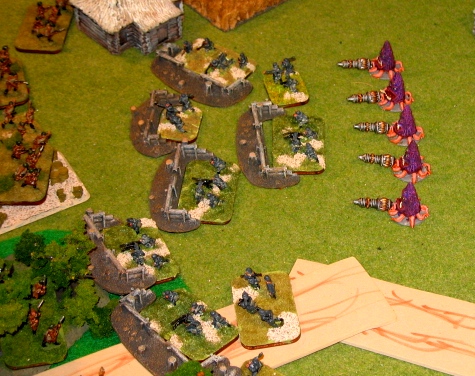
This is just a really cool scene so I took lots of pictures of it.

Mortar fire is even more underwhelming than last turn's, causing just one casualty and pinning one team down.

Even in a close-up, it just looks completely insignificant.
Turn 3

The Soviets assaulted, and all of the mortars became casualties except for the commander. So much for "speed bump."

Meanwhile, the infantry on my right flank takes some light casualties and gets even more pinned.

Later, the mortars' commander runs. The start of my turn is here, and it looks bad...

So I pop my ambush. PaK guns, right on top of the T-34s. I move the commander up to contest the objective, and the tanks are shot at.


No kills, though. Just two bailed-out vehicles (yellow chicken).

My infantry finally opens up on the encroaching Soviet infantry. We get lots of kills, but it still leaves a large portion of the Soviets untouched.

My computer has been weird today, so some pictures have been rotated. There's still a lot of Soviets there to take my objective, with only 10 having died.
Turn 4

The tanks assault and kill my guns. I scored only one kill with three guns in two turns of shooting plus an assault. Disappointing.

Another rotated image. Darn it. The kill is the one on the far right with the turret askew. We didn't put out smoke until later, because whenever the smoke is watching, my stuff dies faster.

The Soviets came in for assault against my infantry, too. My left infantry platoon lost 6 teams but killed 8 after some very vicious fighting that leaves me not quite pushed off of the objective.

My platoon on my right lost 4 teams but killed 8 in some more vicious fighting.

In total, 31 teams were killed during this assault phase. I ran out of skulls and had to use red chickens! It's a sure sign that we have to order MORE skulls!


Yet another rotated picture. My computer is not happy today. The pioneers showed up just in time to push the T-34s off the objective.


But are repulsed! Those machine guns will get you. It's ruled that I can't "retreat" so as to remain within 4 inches of the objective.
Soviet Victory
Soviet Victory

This leaves the Soviet tanks in sole control of their objective to win the game at the start of their turn 5.
 The pioneers look on helplessly as the Soviets seize the vodka dump.


My infantry would have held their objective, but their effort was in vain.

The Soviets won again, the darned fools! Admittedly, this was Dave's almost unbeaten tournament list, but still! I'm 0 for 3!

Maybe it's time to try my luck at something else. I shall next command the Dwarves against their various opponents in Warhammer Fantasy Battles.


 More pictures of the now-finished Slishians... The REAL winners of World War 2!


Conclusions
I have never beaten this exact list or any variation of it. Still worth a try, though.
What could I have done better?
In list composition, I needed armor. Maybe fewer antitank guns, no Nebs, and some panzers instead, as some of my stuff never saw play. I did need the mobile component to battle the T-34s and to insure that my reserves would actually be useful. It also works better with the background text for the scenario, which is all about isolating and destroying pockets using armor.
For deployment, I fully expected this to be a "there can be only one objective" type of game. The lengthwise scenarios where each player places one tend to be that way, but not this time. The T-34s successfully took the underdefended second objective. I should have put some sort of infantry on the second objective, maybe in place of the mortars or something.
In gameplay as well, I just wasn't prepared for that. Also, there's one thing I'm kicking myself about. The pioneers didn't need to assault, as there was a spot within 4 inches of the objective that they could have gotten to without assaulting. I could have prolonged the game for another couple of turns and maybe have won. Oh well, at least it was more fun reporting on the climatic assault.
See you next week in the World's Edge Mountains so some Dwarves can beat up other armies and hopefully not get beaten up themselves.


