Rather than go back to France like I said we would, we decided to go north instead-- all the way to England. My Vikings have invaded and will be attacking Dave's Anglo-Saxons in three short battles using the SAGA rule set for Dark Age skirmishes.
The first two battles were in a small farming village.
Our first battle was just a standard pitched battle, without any special parts. Nice and simple-- just kill the enemy warlord.


We have each deployed our main battle lines in the middle towards my left, with a small unit on the flank towards my right.

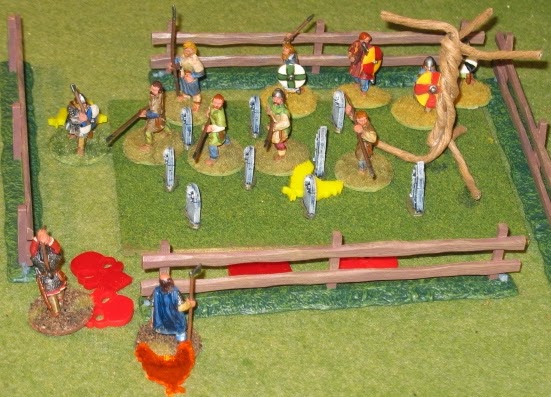
Our forces march up, sustaining some fatigue on our warlords and hearthguard in the middle, denoted by the chickens.

My warriors have hung behind, with one unit of eight going around the building.

My berserkers and warlord move up, slaughtering some Saxons but losing two of our own.

Our next target is likely the weak levy, but the Saxons obviously have different plans.

My remaining berserkers die, leaving my warlord stranded on his own up front. He promptly dies (not pictured)

Now, we are playing a scenario called Duel, in which our warlords become ridiculously tough and enter into a fight to the death.

Our warlords start in the middle, while we have an otherwise normal deployment.

They get stuck in quickly, along with some Anglo-Saxon warriors.

My warriors move up to reinforce an possibly save my warlord.

My warlord has been beaten back by the Saxon warriors, though he slew two of their number.

One of my groups of warriors gets hit hard by their Anglo-Saxon counterparts, losing what looks to be more than half or their number.

My other unit of warriors comes into the fray and evens the odds a little bit.

While we lost a couple of men, we beat the Saxons back and gave our warlord a little breathing room.

It becomes a swirling melee.

Our fatigued Vikings push on and put the Saxons on the defensive.

Battle lines begin to reform, as ever more Norsemen bite the dust.

Our Warlords are locked in mortal combat.

My warlord and his loyal last remaining warrior strike a fatal blow to the enemy.

We come into this third and final battle with each of us having won once.

We will be fighting over three objectives to get points for each of several turns.

The already fatigued Saxons have rushed to the objective. I counterattacked and got pushed back.

I am also up on the hill on the middle, hoping to score some more points.

I have gotten pushed back off the hill. No points for me after all.

I am trying to push the Saxons back out of my barley field, but to little avail.

I have pushed back on the hill with my berserkers.

The Saxons are still firmly in control of this game, sadly. They are leading in points by a large amount.

I have successfully gotten the Saxons out of my barley, but at what cost?

The levy take up defensive positions.

My hearthguard and berserkers went in, lost half their number, and retreated.

It is looking grim. Too many good warriors have died.
My hearthguard push the levy back but still have not made it back into the sacred graveyard.

We are coming closer but still a long way off in points. It's all about the SAGA, though.

We face off across the graves for the final showdown.

The warlord chases the last levy out.

We went from 58 to 4 models on the table-- a very bloody battle.
While the Anglo-Saxons won based upon points, it's all about the SAGA, the spirited counterassault and the cowardly levy. Or the last stand, either way.
I like SAGA. It's a fun, fast, and bloody skirmish game, and I can easily foresee myself playing it again soon.
See you next week with the report on my trip to the club tomorrow.
Cool looking game Jordan, very bloody indeed!!! Keep up the great work!!!
ReplyDelete